Vegan Fresh Pasta - Orecchiette in an Aglio E Olio Sauce
Servings: 4 people
Equipment
- Weighing Scales
- Measuring Jug
- Bench Scraper (optional)
- Wire Rack
- Butter Knife (optional)
- Clingfilm
- Saucepan
- Knife
- Chopping Board
- Ladle
Ingredients
For the Pasta Dough
- 450 g Fine Semolina Flour 00 Flour or Plain Flour
- 225 ml Water
For the Aglio E Olio
- 4 tbsp Extra Virgin Olive Oil
- 4-5 Cloves Garlic diced
- Handful Fresh Basil roughly chopped
- Handful Fresh Parsley roughly chopped
- Salt to taste
Instructions
For the Pasta Dough
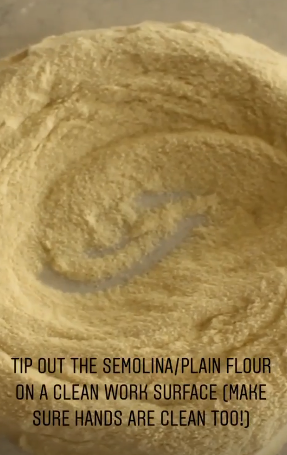
- To begin, pour all the semolina or plain flour straight onto a clean work surface. As we’ll be doing a lot of kneading, it’s easier to do this directly on a counter-top than on a chopping board or in a bowl. If you do not have any available counter space, a chopping board or bowl will work too!
- Create a large “well” in the middle of the flour using your fingers.
- Slowly pour all the water into the middle of the well.
- Using a fork, begin to mix the flour and water together until the middle of the well reaches a cake-batter consistency.
- Next, use a bench scraper to fold the outside edges of the dough into the centre and to cut into the dough. Keep folding and cutting the edges of the dough into the centre for about 2 minutes or until the dough has come together enough to knead with your hands. If you do not have a bench scraper, you can do this whole process with your hands.
- Use your bench scraper or hands to press the mixture into a ball.
- Now knead the dough for 7-10 minutes. Think of kneading like leaving a parking space - reverse the dough towards you then pull out of the space away from you! What this means is to use the heel of one hand to roll the dough towards you then using the heel of that same hand, quickly push the dough away from you. Give the dough a turn then repeat this movement for 5 minutes or until the dough becomes moist and elastic.
- Wrap the dough in clingfilm and let it rest on the counter for 15 minutes. This will help to ease the gluten and hydrate the dough.
- We will now knead the dough one more time for 5 minutes, but for the last 2-3 minutes knead in a small circular motion to create a nice ball of dough.
- Wrap the dough in cling film again and let it rest for at least 2 hours or as much as 24h if you prefer.
- Once the dough has rested, remove the cling film and cut a small section from the dough. Wrap the rest of the dough back in the cling film so it doesn’t dry out.
- Roll out the slice of dough with your hands into a long, even rope, about 1cm thick.
- Now cut off a slice (about 1.5cm) of dough. Use a butter knife with even pressure, slide the dough towards you so that it scrapes along your work surface while retaining its circular shape. Now turn the orecchiette inside out so that it resembles a little hat/ear.
- Now cut off a slice (about 1.5cm) of dough. Use a butter knife with even pressure, slide the dough towards you so that it scrapes along your work surface while retaining its circular shape. Now turn the orecchiette inside out so that it resembles a little hat/ear.
- Congratulations! You’ve made your first orecchietto! Now place it on a wire rack to dry out as you get to work on shaping the rest of the rope.
- Once you’ve finished the rope of pasta, cut another section of dough from the original ball and start the process all over again until you finish the whole ball of dough. If you find the pasta becoming a bit too sticky, you can add a small amount of flour to your work surface. If you find the dough is too dry, you can wet your hands slightly.
- This process can take about 40 minutes if making by yourself, so feel free to stick some headphones in or turn on Netflix!
- Leave the orecchiette to dry on the wire rack for at least 1 hour before using. You can also store the orecchiette in the fridge for up to 3 days.
For the Aglio E Oglio
- Bring a pot of water to boil and add salt. Pasta maestro, Evan Funke, suggests we salt our pasta water as if it were soup – rather than making it taste like the Atlantic Ocean!
- Add the fresh pasta and cook for 2-3 minutes.
- While the pasta is cooking, add the Extra Virgin olive oil and garlic to a saucepan then turn the heat on low. This should help to infuse the oil and the garlic as they heat up together.
- Lightly fry the garlic until the pasta has had its 2-3 minutes.
- Now, add a ladle of pasta water to the infused garlic and allow it to simmer. This helps to cool the pan down and the starch from the pasta water will create a creamy sauce.
- Quickly transfer the orecchiette to the garlic saucepan with a slotted spoon without waiting for the water to drain, as we will be adding more pasta water anyway.
- Toss the pan to ensure the orecchiette are coated in the aglio e olio sauce.
- Add the fresh herbs and toss again.
- Add 2 more ladles of pasta water and gently cook it off until you have a creamy sauce. Taste a piece of the pasta to make sure you’re happy that it’s fully cooked with a bit of chewiness. Now serve and enjoy – you deserve it!